*So* not on my to-do list…

This *so* was not on my list of things to do this morning.

20120809-103823.jpg

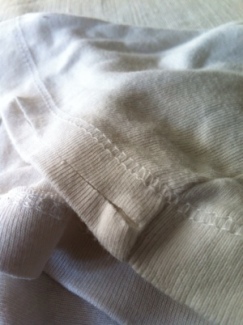
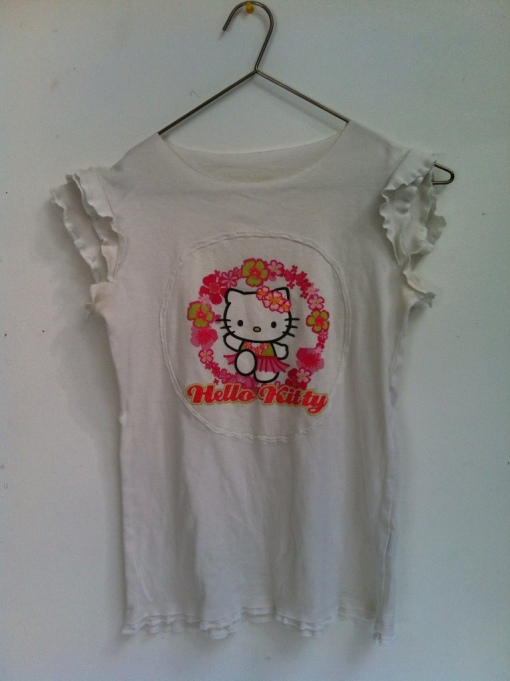
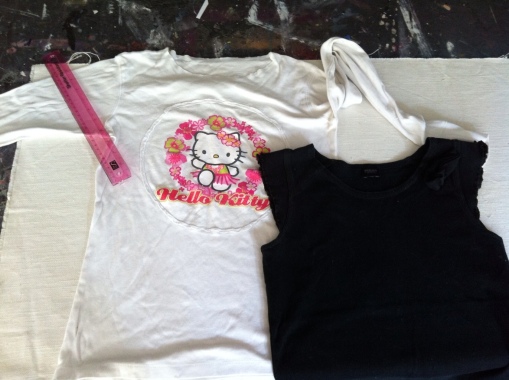
But while my tea is brewing, I have a thought, and that thought quickly multiplies. What if, I copy some of the techniques on my frilly-sleeved La Redoute black tshirt, and apply them to the Hello Kitty tshirt that’s been in the mend/alter/bring back to life pile for the last couple of years? Hello Kitty jumps the queue.

20120809-104128.jpg

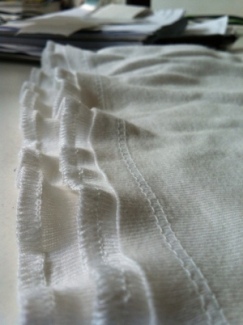
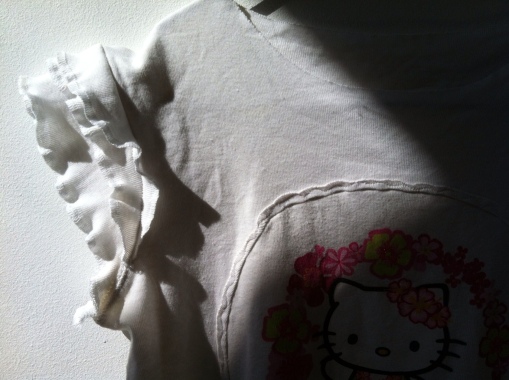
I cut the sleeves off and overlock them using a narrow hem, stretching the fabric like mad to get a frilly edge. It’s called a lettice hem – here are some good instructions, if you’re interested.

20120809-104106.jpg20120809-114202.jpg

Then I cut through one layer of the bottom hem of the tshirt and lettice-hem the resulting lower edge, again. From the leftover sleeve material, I cut two long cucumber shaped ovals, and lettice-hem the edges. Finally, I straight stitch the frills to the existing armscye-sleeve seam. They flop over quite pleasingly.

The End.
Now. Where was I?
20120809-104050.jpg

Poppy playsuit

20120720-155956.jpg
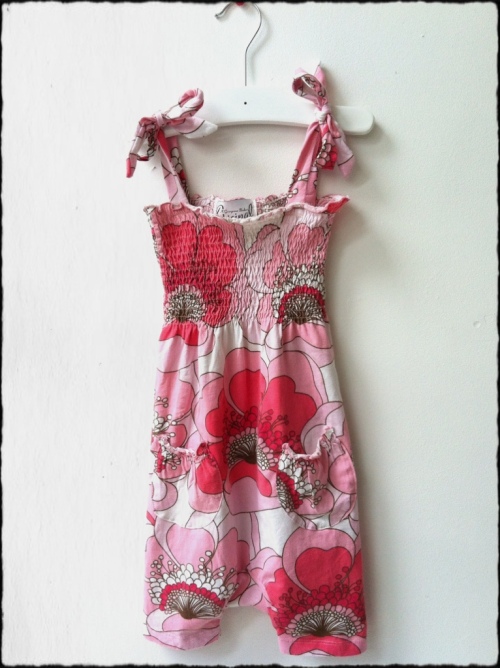
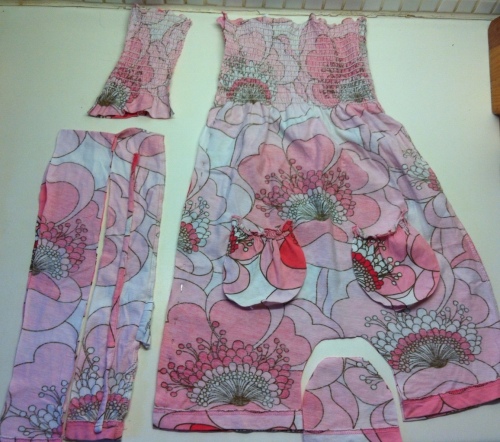
Loved this poppy print when I spotted it in a charity shop and decided to buy it whatever it turned out to be. And it was a cute shirred top… for a 12 year old.

There’s no way that’ll be me, so this is obviously destined for a certain Little Miss, whose wardrobe has a large poppy-playsuit sized hole in it. There’s enough fabric for my playsuit vision, although early signs are ominous – I hold it up to her to gauge size and she screams and throws herself to the floor. Oh dear.

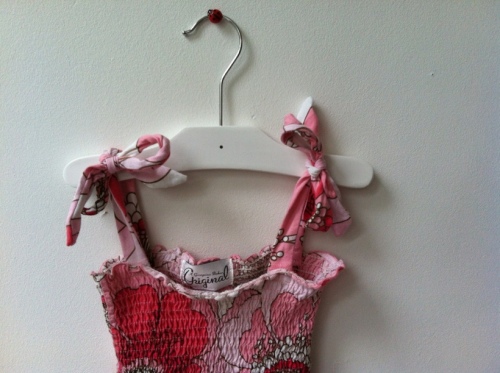
20120720-155405.jpgUndaunted, I trim about 20cm off the overall width, and use the spare fabric for a couple of wide-ish shoulder straps – the original straps were a bit cheese-cutter for little shoulders. I cut a semi-circle out of the hem to create legs – not sure how well this will work, but we’ll see. The cute, gathered pouch pockets move over easily to sit at her hip height – I hope she finds something interesting (and non-staining) to put in them!

20120720-160119.jpgMore importantly, I wonder if she’ll wear it?

Sunshine yellow skirt

grey day

I’ve waited months for a day like this – grey, drizzly, unwelcoming weather. And the best bit? I’m at home to enjoy it.

And, what’s even better, there’s *just* enough of this bright yellow fabric to make Marina a skirt that’s been on my mind for quite some months now.

yellow fabric

So, the plan is…

  • draft a rough pattern using a GAP skirt for overall dimensions
  • find buttons for the pocket flaps
  • pop a couple of buttonholes in some elastic in to make the waistband adjustable
  • dig the sewing machine out
  • and get sewing.

pattern idea sketch

The big question is will she wear it? Drop by tomorrow next week for photographic evidence….

Update: sewing halted by life events… more soon.

Stars and circles bath robe

Marina in dressing gown - final

Well, that was a project. From scratch, using a vintage towelling fabric from Chiswick Boot Fair (thanks Bridget from What the Butler Wore, for spotting it AND giving excellent directions across an ENORMOUS field full of car booters, to find it instantly), and some cotton spotty lining from John Lewis.

Dressing gown on hanger

Pattern is Robot Dog bathrobe (style 33) from Ottobre magazine , which if you haven’t come across it yet, is a Finnish pattern magazine for children. Hubby bought me an annual subscription for Christmas and each issue has something like 30 patterns – amazing value and some really cute, inspirational styling.

Image from Craftymama.blogspot.co.uk. Thanks!

Tracing the patterns is a bit of a trip – 150-odd pattern pieces packed onto three double-sided pages, each pattern in approximately six different sizes and in different colours. See? But you just kind of focus in, and all the other lines just melt away and your get your tracing wheel and ruler out and follow your single little line. Probably best done when children are in bed, hubby’s Doing Something That Doesn’t Involve Talking To You Or Being Anywhere Nearby, and pets are outside. Useful pattern-tracing tutorial from Crafty Mamas here, if you’re inspired to try it yourself.

Dressing gown lining

Construction method of the Robot Dog bathrobe (style 33) is straightforward, and it comes together so quickly and simply. I’m reminded why I love sewing, coming on the back of the fiddly, finger-pricking, and funk-inducing lunchbag project. Put it this way, I skipped meals to move on to each next step.

dressing gown clipping curves detail

And got very precise, neat and detail-focused. Check out those clipped curves!

Dressing gown pocket detail

So I finished it, delighted with the colours, and really proud to have done such a neat job. 21-month-old daughter, however, NON-BLOODY-PLUSSED. The following photo records one of the nine or so seconds she’s kept this bathrobe on.

Marina in dressing gown

Will not wear it in the morning, evening, after bath, watching TV or reading a book. Not too downhearted, though. There will be a birthday, large toy or dressing up occasion that it will be PERFECT for.
Self drafted bean bag seat

bean bag seat with friends

Had been thinking about a beanbag seat for Marina for some time, and mentioned it to a friend. Who, the next day, texted to say she’d seen one in a local charity shop window. FIVE pounds! Dashed over there the next morning and lugged it back home on the back of the buggy. It’s clean, a great shape – a bit like a bell – and more to the point, Marina sits in it. As do her friends :)

bean bag seat

So I just made a straight copy of the cover. It’s basically a rectangle, with a curve at the corners, and two deep darts from the middle to the top, attached to a circular bottom with a zip across the middle. And a wide fabric handle – another rectangle. I wrote out the measurements – you could easily make your own. No need to mark it up on paper – just do it straight onto the fabric.

bean bag seat pattern

Mini-tutorial: cut 2 body pieces (88cm x 110), 1 bottom (69cm diameter), 1 handle (50cm x 20cm). Find 60-65cm zip.

  1. sew two deep darts as indicated, overlock or zigzag edges. Trim excess and press darts.
  2. fold handle along long edge, right sides together and stitch along long edge, 1 cm from raw edge. Turn and press, keeping seam at edge (or centre if you prefer it to be hidden)
  3. fold handle in half, matching raw edges, and pin to right side of centre top ‘body’, between darts.
  4. pin front and back ‘body’ together and sew along side, around curve, over the top and back down to the other side.
  5. cut bottom in half through the middle and insert zip along cut edge
  6. attach bottom to body, clipping as needed.

Now THAT’S satisfying sewing. It wasn’t exactly a whip-up – I think it took about three hours, what with pattern matching and a broken needle or two, and a funny turn where I realised how very hungry I was.

bean bag seat handle

But, this fabulous IKEA fabric by Cilla Ramnek (2008) is pretty impactful and seeing the whole thing coming together was deeply, deeply satisfying. I love that the fabric credits the designer – it’s worth keeping this in the finished item, I think. Anyway, back to completion jubilation – I used something out of the stash! Hoo-bloody-rah-for-me.

Publishing now – will try to pose daughter in seat over weekend. Don’t hold your breath…

And that very evening, Marina graces the bean bag seat with her seat. Hurray!

About me


I started this blog to help me Get Things Done: sewing and knitting mostly.
But now I have a daughter! So I continue to daydream in enormous detail about what I'd like to make, but squeeze the 'doing' into precious naptimes and evenings.

Can I keep it up? Time will tell!

Want to follow my blog and get notifications of new posts by email?

Join 55 other subscribers

Older posts