A wee bag

drawstring bag
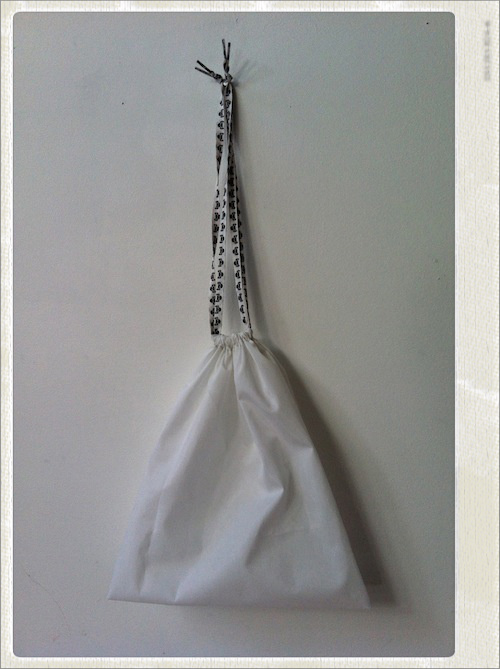
A wee bag for Little Miss. She needs a waterproof bag to bring home sodden “worn” outfits in, from time to time. Parents of potty-trained toddlers will know exactly what I mean…

There’s about a billion great tutorials for drawstring bags out there on tinternet – all pretty similar, but this one from Purl Bee is beautifully clear and well laid out. I used the tried and trusted John Lewis shower curtain fabric (approx £7 per metre).

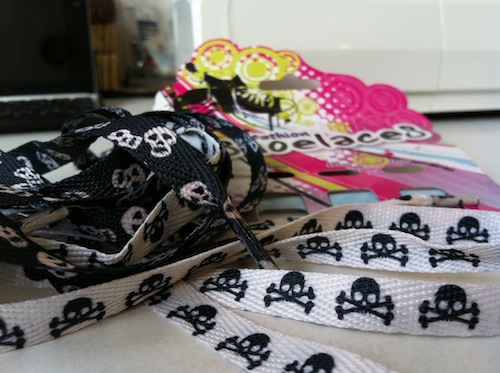
Drawstrings - shoe laces

The drawstrings are “Fashion Shoelaces” from Poundland (£1 for four pairs – bargain!). I wonder when she’ll notice she has skull & crossbones drawstrings?

Self drafted bean bag seat

bean bag seat with friends

Had been thinking about a beanbag seat for Marina for some time, and mentioned it to a friend. Who, the next day, texted to say she’d seen one in a local charity shop window. FIVE pounds! Dashed over there the next morning and lugged it back home on the back of the buggy. It’s clean, a great shape – a bit like a bell – and more to the point, Marina sits in it. As do her friends :)

bean bag seat

So I just made a straight copy of the cover. It’s basically a rectangle, with a curve at the corners, and two deep darts from the middle to the top, attached to a circular bottom with a zip across the middle. And a wide fabric handle – another rectangle. I wrote out the measurements – you could easily make your own. No need to mark it up on paper – just do it straight onto the fabric.

bean bag seat pattern

Mini-tutorial: cut 2 body pieces (88cm x 110), 1 bottom (69cm diameter), 1 handle (50cm x 20cm). Find 60-65cm zip.

  1. sew two deep darts as indicated, overlock or zigzag edges. Trim excess and press darts.
  2. fold handle along long edge, right sides together and stitch along long edge, 1 cm from raw edge. Turn and press, keeping seam at edge (or centre if you prefer it to be hidden)
  3. fold handle in half, matching raw edges, and pin to right side of centre top ‘body’, between darts.
  4. pin front and back ‘body’ together and sew along side, around curve, over the top and back down to the other side.
  5. cut bottom in half through the middle and insert zip along cut edge
  6. attach bottom to body, clipping as needed.

Now THAT’S satisfying sewing. It wasn’t exactly a whip-up – I think it took about three hours, what with pattern matching and a broken needle or two, and a funny turn where I realised how very hungry I was.

bean bag seat handle

But, this fabulous IKEA fabric by Cilla Ramnek (2008) is pretty impactful and seeing the whole thing coming together was deeply, deeply satisfying. I love that the fabric credits the designer – it’s worth keeping this in the finished item, I think. Anyway, back to completion jubilation – I used something out of the stash! Hoo-bloody-rah-for-me.

Publishing now – will try to pose daughter in seat over weekend. Don’t hold your breath…

And that very evening, Marina graces the bean bag seat with her seat. Hurray!

Four tea-towel lunchbags – warts and all


Everything starts somewhere. These four lunchbags started life because we had so many teatowels (and much other crap, truth be told) that the kitchen drawer wouldn’t close. So the drawer got a good overhaul and into the bin went four pretty tea towels that only dry one plate before becoming limp, damp rags. Pointless.

So, hating seeing textiles in a bin, I lifted them out and tucked them away in the stash. They seemed perfect for lunch sacks, and I have just the tutorial: Lemon squeezy’s lunch sack. I’ve have been dying to use it – it’s a brilliant tutorial, super clear instructions, a very simple construction method – and it looks great!

two lunchbags

two lunchbags rear

I adjusted the measurements to give them a wider base – that way they fit perfectly the plastic takeaway boxes I use for my leftover lunches. I used John Lewis’s shower curtain fabric for the lining – which means leaks are very water-proofed. The colours of the towels look pretty groovy and the finished bags are clearly not from Asda – or the same as anyone else’s.

I’m really pleased to have completed them – they will be put to good use, as I’m taking lunch into work more often these days (King’s Cross is not great for quick and satisfying snacking) and Marina needs snack bags when we’re out and about.

lunchbag from tower of london tea towel

lunchbag with lid open

lunchbag interior with label

Why warts and all? I have to say, that they’re neither my proudest achievement nor most enjoyable sewing experience. Why? Because I found this simple project really hard. Working with stabiliser makes for really hard, manual sewing, because your fabric is really….stiff!

And even harder to apply bias binding to. I’ve not much experience working with bias binding, and this was my first experience of using my bias binding foot, which I found really fiddly to use. So I was disappointed that the ‘more finished look’ I was hoping for is actually the bit that looks the crappest: wrinkled, uneven stitching and very wonky in the inner corners by the lid.

lunch bag wonky stitching

And I stupidly used a different colour thread so all the non-smooth stitching, wrinkles and swerves missing the inner corners are very, very obvious.

BUT look. They are now off the to-do list, and hey, today, that’s the most important thing. I’m sure as I put them to use I’ll notice these things less, and be a bit more forgiving of myself and my less-than-perfect efforts. And, seriously, I’m not about writing blog posts that just present a perfect sheen of glossy gorgeousness. This was the result of some hard work!
Two little bags

zippered bags

Inspired by loweryourpresserfoot’s lovely idea for zippered wristlet purses, I whipped up a pair of baglets for my lovely Australian colleagues who are leaving the UK this week.

zippered bags

I wonder what travelling adventures they’ll enjoy with their baglets made from

  • a modified version of this tutorial – flat bottoms = much more practical
  • plasticised fabric from John Lewis
  • shower curtain lining (how practical! Anything spilt inside will STAY inside!) – also available from John Lewis
  • ego labelling courtesy of Charm Labels

zippered bags, end detail

It’s so sad saying goodbye! I was excited to escape Mummyland and see my colleagues for farewell lunch today, but so heavy-hearted. A & M have both been a major part of a set of golden years as a great team.

Won’t be the same without you.  Don’t forget us!

Diaper bag – from scratch and at what cost?

Baby due next Friday. Seems like a good time to squeeze in a project to deadline…

All signs indicate a diaper bag is needed. A visit to John Lewis stimulates acquisition gland, a quick check on the price tag withers gland to small raisin. £165.00 will get you waterproof bag with change mat (or for £169, you can buy the bag direct from Orla Kiely herself. The extra fiver probably accounts for a nicely decorated bag to put your newly acquired bag in). But it’s purdy!

orla kiely diaper bag

You know what I’m going to say: I could make one of those. So I’m going to give it a crack, and use Make It Smirk’s approach of costing up the materials, fixings and linings (on a stunningly expensive, but beautifully executed Amy Butler bag), to see how much money this endeavour ‘saves’. Needless to say, I’ve already ‘saved’ money, as I bought the plasticised table-cloth and shower-curtain fabrics yonks ago.

What’s the unit price of  liberating fabric from the stash? Shall think on it as I labour away over the kitchen table…

About me


I started this blog to help me Get Things Done: sewing and knitting mostly.
But now I have a daughter! So I continue to daydream in enormous detail about what I'd like to make, but squeeze the 'doing' into precious naptimes and evenings.

Can I keep it up? Time will tell!

Want to follow my blog and get notifications of new posts by email?

Join 55 other subscribers

Older posts