A wee bag

drawstring bag
A wee bag for Little Miss. She needs a waterproof bag to bring home sodden “worn” outfits in, from time to time. Parents of potty-trained toddlers will know exactly what I mean…

There’s about a billion great tutorials for drawstring bags out there on tinternet – all pretty similar, but this one from Purl Bee is beautifully clear and well laid out. I used the tried and trusted John Lewis shower curtain fabric (approx £7 per metre).

Drawstrings - shoe laces

The drawstrings are “Fashion Shoelaces” from Poundland (£1 for four pairs – bargain!). I wonder when she’ll notice she has skull & crossbones drawstrings?

Jump to the beat

Sewing soundtrack: Stacy Lattisaw’s Jump to the beat! If I could have sewed wearing roller skates, I surely would have.

Hubby’s I ♥NY t-shirt has had a bit of a rough time over the years, sad to say – pale pink splodges and shrinkage, so off into the refashion pile it goes. Flush from the success of the Poppy Playsuit (she wears it!), I rustle up this number for Little Miss in a couple of hours.

This needs just one adult size tshirt. Cut it out like this – I used guesswork, a pair of shorts and a tshirt to get the proportions about right. It’s supposed to fit loose, so precision not necessary. First sew on the pockets. The pockets are made from the sleeves, so have a pre-finished hem. Gather the tops of the pockets by running a length of shirring elastic through the hem, and gather the bottoms of the pockets with a long running stitch.

NY jumpsuit pocket closeupNext sew the leg seams and crotch/centre front seam. I serged it. Easy-peasy. Then finish the underarm edge by folding a 4mm hem (twice) and multi-stitch zig-zagging it – this is the bit that was the original t-shirt’s neckline.

NY jumpsuit underarm detailLastly, fold over about 5cm at the top neck edge, and multi-stitch-zig-zag that too. This creates the channel to feed the ties through.

NY jumpsuit strap channelYou can use ribbon, jersey scraps or anything else that works for you – I used the sleeve of another old tshirt and made these tapered tubes.

NY jumpsuit straps

I left a gap in the stitching about halfway along the long edge so I could turn the tube inside out. After feeding the ties through, I secure them with a few straight stitches at the front/back centre seam.

DONE. And she wears it. I couldn’t get Little Miss to jump to the beat so we rocked down the street instead! Happy days!

NY jumpsuit in action

A simple top. But complicated.


I snaffled a polyester top for £1, from an RSPCA charity shop, on a bit of a whim. It’s navy blue, and a very simple, boxy shape, which really shouldn’t suit me. But flowy polyester is surprisingly forgiving to a matronly bosom, so it became an instant, much-worn, summer hit.

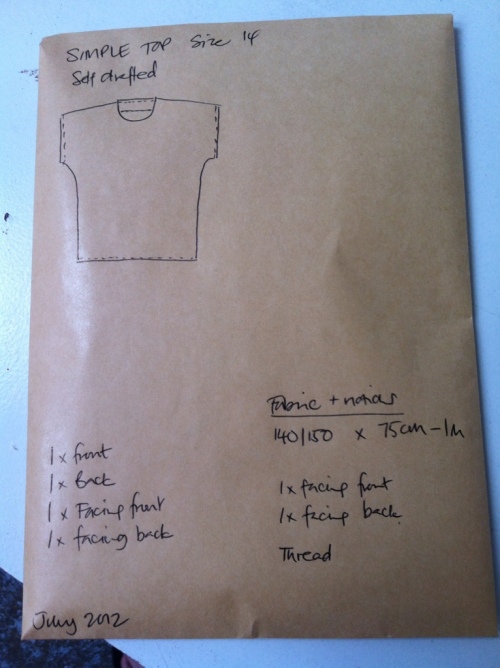
So much so that I dashed off a paper copy of the pattern and worked out the construction method, to make more. Just five major seams and four edges to finish. Could it be simpler? There’s a metre of grey and white patterned silk out of the stash, possibly Vivienne Westwood, that a friend passed on from a remnant sale – I’ve been trying to think of a good use for it for years. Perfect weight and just enough of it. Simple – you’d think.

20120720-134347.jpg
Problem one: the pattern features wide stripes of contrasting tartans, one light, one dark. If I cut the fabric so the dark tartan is centred on the garment – great, looks good. If I cut the fabric with the light tartan in the centre of the garment – makes me look wide as a house. Only problem – the fabric isn’t wide enough to accommodate the better-looking approach. *Sighs* This fabric is too good to waste on an unflattering garment. I have to give it my best shot.

So. I slice 30cm off one side of the fabric and piece it to the other side of the fabric. This requires some pretty hefty pattern-matching – and also means a blimming great seam down the front and the back. This is before I’ve even cut out one garment piece!

Problem two: at some point, someone has hacked a carrot-shaped wedge hacked out of the fabric that, now I’ve pulled this clever piecing-manoevre, falls right in the middle of the shoulder, at the front. Suddenly I’ve got to adapt the super simple design to accommodate a bloody 10cm dart at the shoulder. Hold on, I thought this was supposed to be simple! And I haven’t even started  on how hard it is working with silky fabrics. I have new-found respect for everyone who works with this misbehaving stuff.

Still – as you can see from the picture – I stuck at it, got it done, and will wear it tomorrow. Kudos to anyone who can spot the stitching lines where I pieced the fabric and added darts. But no prizes.

Sunshine yellow skirt – finished

Yellow skirt final An amazingly sunny day, and instead of rushing out to the park to enjoy it, I finally completed the sunshine yellow skirt. I tried to sew quickly and efficiently, and sort of failed. Don’t get me wrong – the finished item is a good bit of sewing, but my thought processes were super-muddled and I did LOTS of staring into space. My muddledness included: sewing on the yoke upside down. Three times. Sewing the faux pocket flaps on the back instead of the front, as per my design. Then realising they look better on the back and sewing them back in place. Cutting the waistband 10cm too short. And instead of focusing solely on drafting the pattern and making the skirt, getting sidetracked, halfway through, into a poorly executed and fruitless tidy-up of the hall cupboard – abandoned after 35 minutes, annoyingly. Pocket flap close upBut I’m happy with the finished item – it’s as I envisaged, pepped up a little with a contrast floral fabric on the pocket flaps and the waistband facing. The adjustable elastic on the waistband looks about right (see, I’m very scientific about these things. Measurements are for wimps). Yellow skirt waistband Next step – seeing if Little Miss will wear it. The photographic evidence is…. Yes! She likes it – strikes a moody model pose! putting on yellow skirtYes! She tries to put it on, voluntarily, before I’m quite ready with camera! Yellow skirt and matching shoesHurrah! Selects coordinating shoes! yellow skirt washing hands Praises be! Wears it while washing hands! yellow skirt with dinosaurGadzooks! Confronts dinosaurs in it! yellow skirt at playgroupand finally, wears it in public at playgroup *sniffs* To say I’m pleased is an understatement. Thanks Marina. I made your skirt, you made my day.

Sunshine yellow skirt

grey day

I’ve waited months for a day like this – grey, drizzly, unwelcoming weather. And the best bit? I’m at home to enjoy it.

And, what’s even better, there’s *just* enough of this bright yellow fabric to make Marina a skirt that’s been on my mind for quite some months now.

yellow fabric

So, the plan is…

  • draft a rough pattern using a GAP skirt for overall dimensions
  • find buttons for the pocket flaps
  • pop a couple of buttonholes in some elastic in to make the waistband adjustable
  • dig the sewing machine out
  • and get sewing.

pattern idea sketch

The big question is will she wear it? Drop by tomorrow next week for photographic evidence….

Update: sewing halted by life events… more soon.

About me


I started this blog to help me Get Things Done: sewing and knitting mostly.
But now I have a daughter! So I continue to daydream in enormous detail about what I'd like to make, but squeeze the 'doing' into precious naptimes and evenings.

Can I keep it up? Time will tell!

Want to follow my blog and get notifications of new posts by email?

Join 55 other subscribers

Older posts